The Melilot Shirt by Deer & Doe was a recent make, but unfortunately did not fit my proportions. This blog post is about my second attempt, mainly to fit my broad shoulders and larger arms.
As you may know (if you've read the previous post) I had issues with the fit of the first iteration of this pattern. Mainly the shoulders, arms and the bust point, as I have broad shoulders, larger biceps and a long torso. This presented a unique fitting challenge, as there is a lot going on here. Hence, I turned to my well thumbed fitting alterations bible...

After careful consideration of what issues were plaguing this particular pattern on my form, I settled on making the Square Shoulders and Lower Bust adjustments. I love this book because it shows how to make these changes on a range of pattern styles - darted bodice, princess seams and kimono blocks, which proved very helpful in this instance.
So, I approached the pattern with the shoulders and arms in mind first. Marking the seam allowances and slashing the pattern as pictured in the diagram, with the exception of the horizontal line. This line was redirected through the arm depth, as I had yet to alter the bust point and did not want to make adjustments in this area which could potentially compound into a complex problem.


I ended up adding 0.8cm (8mm) of height to the shoulder area and 0.5cm (5mm) width horizontally. The sleeve depth had an additional 1.4cm included. The bust point was lowered by cutting the entire bust point as a rectangular section and moving it down 2cm. Once all the seam lines were redrawn/trued, I measured each seam line and compared it to the back to ensure accuracy. The final pattern was a little bit of a "frakenstein-pattern", but I believe it will be a much better fit.


PATTERN DESCRIPTION
MÉLILOT SHIRT
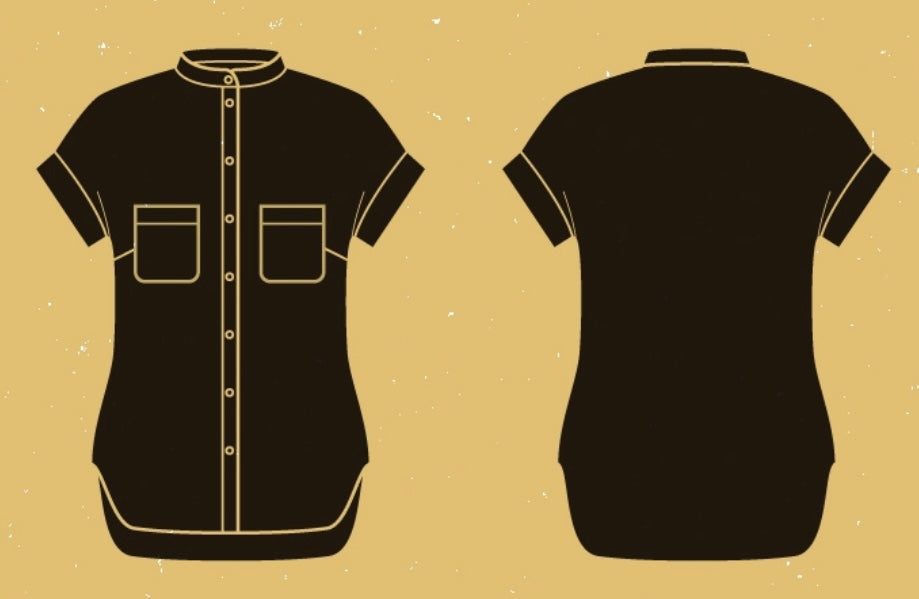
LEVEL : 4/5 (Advanced) Casual shirt with drop shoulders. Version A: long sleeves and rounded collar; Version B: cuffed short sleeves and mandarin collar. I mixed things up and made Version B with the rounded collar from Version A
PATTERN SIZING: Available in sizes 32-52. I made the size 50 and I sit at 16F in the bust, 16 through waist and hips.
PHOTO/LINE ART ACCURACY: Identical to the line art and photography provided.
INSTRUCTION ACCURACY: Fully constructed with French seams (love me a good French seam) so the garment finish is beautiful inside and out. The most difficult part of the whole pattern is the curved hem. My process to produce a fine finish on the hem was thus
- Overlocking the hem edge first to provide you with a stable and even width edge
- Carefully press this edge to the inside of your garment
- Pick up your tailors ham and place the curved hem section over the curve of the ham. Carefully fold the hem up over the overlocking and pin in place, thus completing the double fold of the hem. This will need to be done in small sections. You can pin directly into your pressing ham.
- Once your happy with how the pinned edge is sitting on the ham, steam and press with your iron. Once done, remove the pins and reposition the curved edge AROUND the curve of the ham and press again. This step helps to even out the fullness of the upper edge and get a beautifully uniform finish.
- When sewing the hem, kept the curve of the hem true when it's sitting on the bed of the machine. Don't try and force the curve to a straight line under the foot and reposition the curve as many times as you feel you need to (with the needle in the fabric). This process takes patience, time and practice to get right.
FABRIC USED: Silk/cotton voile (30%silk/70% cotton) in White from SilkWorld
PATTERN ALTERATIONS/DESIGN CHANGES: Square shoulder, armhole depth and lower bust point adjustments
REPEAT PERFORMANCE: Just try and stop me from making one in every colour.
Coming up next, the final finished product...

